I acquired the love to make beautiful quilts of my own after a friend encouraged me to join her in a quilting class.
Even though I have always loved the look of quilts I thought I would never want to make one.
But…even after being warned that quilting could become an addiction…making that first quilt did it for me.
I was hooked.
I’ve been quilting for many years now and I love the stress-relieving, creatively satisfying feeling that making a beautiful quilt with my own hands provides.
Being new to quilting you probably want to know what is needed to quilt.
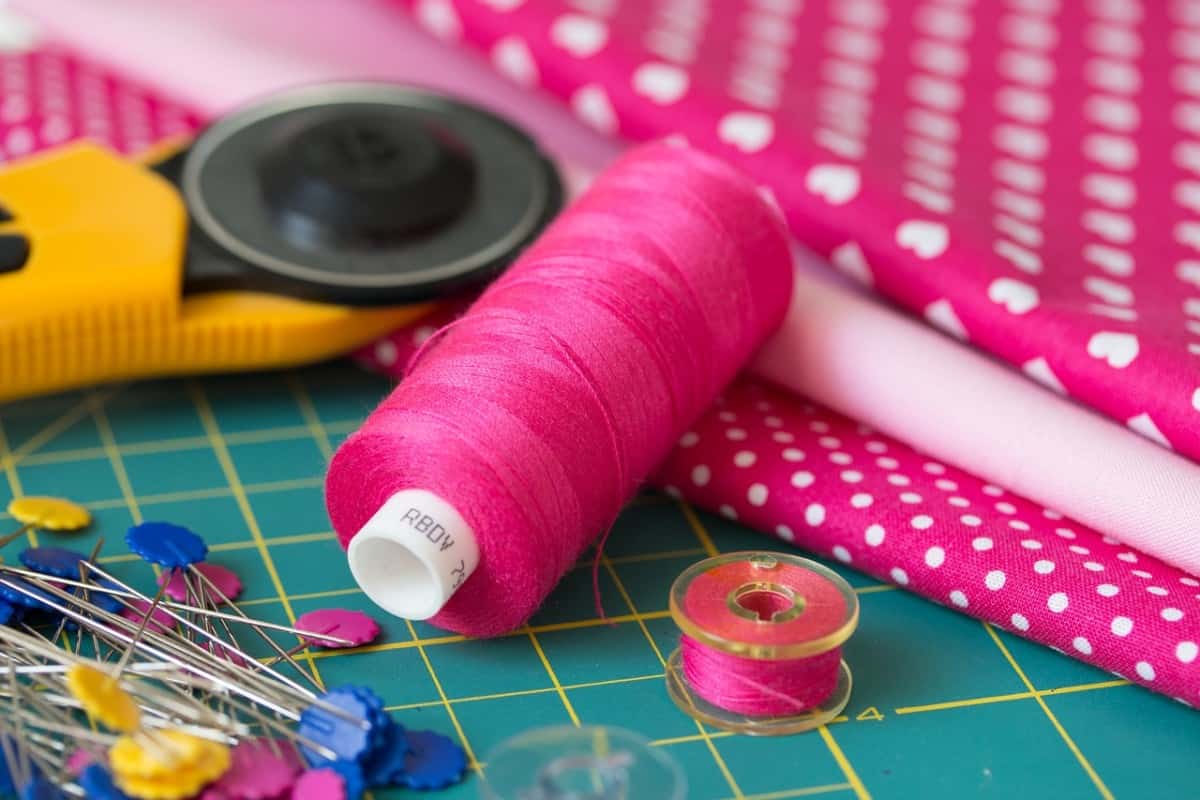
One of the joys of quiltmaking is the fact that the tools and supplies needed can be as simple as a pair of scissors, needle and thread (and fabric of course).
Or it can be more complex with a few more essential notions, tools, equipment and supplies that are needed to make your first quilt.
I started out quilting with just a few things like my sewing machine, some thread and a pair of scissors which I already had since I’d been sewing much of my life.
I purchased a cutting mat, ruler and rotary cutter and that was about it.
I was ready to learn to quilt.
As I learned to quilt I gradually added to my notions, tools, equipment and supplies which has made it much easier to create beautiful quilts.
In this beginning quilters guide we will be going through the different tools and materials needed (and a few others you might want as you get more experienced) to make your first quilt a joyful successful quilting experience.
As a beginner quilter you can decide which are the best choices for you as you begin your journey into the wonderful world of quilting.
What Materials Are Needed For Quilting Projects
Obviously if you are going to make a quilt you will need some fabric.
You might also need some batting if you plan to finish the quilt or quilted project yourself.
What Is The Best Fabric For Quilting
What is the best type of fabric for quiltmaking?
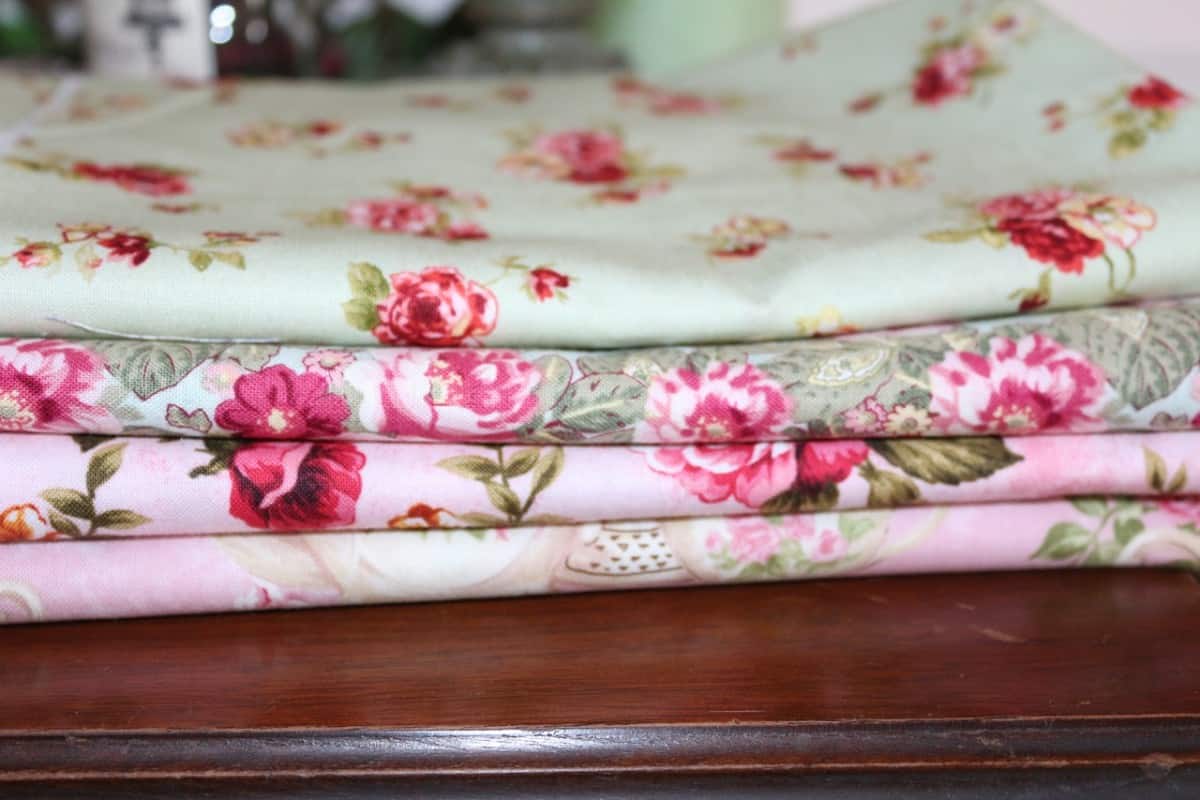
Fabric that is 100% cotton is the best choice for making quilts.
Because it is easy to cut, easy to sew and holds up well to handling both while making the quilt and after its finished and being used.
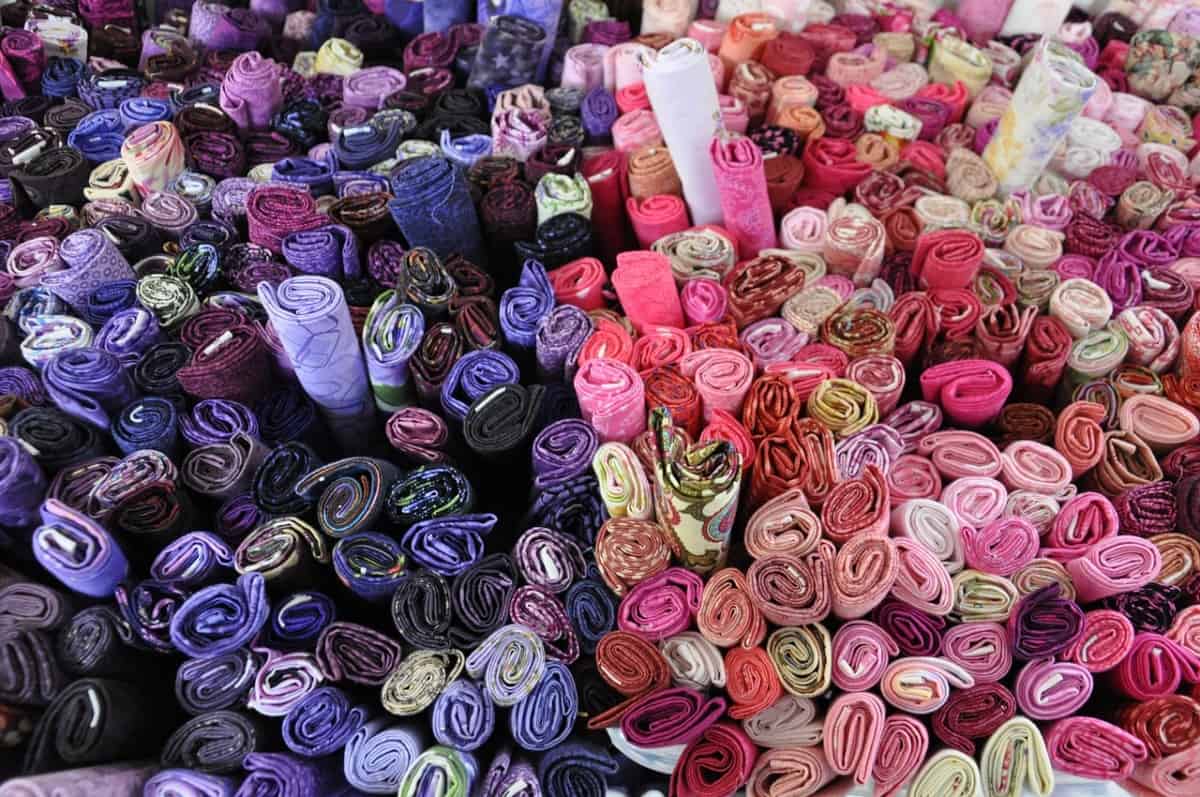
Selecting your choice of fabrics for your quilt projects can be so much fun!
Many times I have spent hours and hours in fabric stores deciding on and choosing lovely fabrics for my various quilting projects.
The choices are endless!
Taking the time to select just the right fabrics in just the right colors and prints is part of the fun of quilting
And more than worth the effort to give your quilt the personality you desire.
There is a difference though in quality where fabrics for quilting are concerned.
Starting with high quality cotton is a superior product that is less likely to bleed when washed, are easy to press and holds a crease well.
Cotton fabrics are available in a wide range of colors and prints.
Thread count, the number of threads per square inch, is what determines the quality and weight of cotton fabric.
When the thread count is the same for both length and width, this is called an even weave.
Quilting cotton fabrics are higher in thread count (68×68 threads per square inch or 78×78 threads per square inch) than lighter-weight cotton.
Lower thread count cottons are too lightweight to use successfully for quilting as they can ravel and fall apart too easily when handled.
You will also get more shrinkage, less durability and bearding (batting that comes through the quilt top or backing) when the piece is quilted.
On the other hand, you don’t want to use really high thread count cotton for backings, such as sheets, as it is more difficult for needles to go through, making it difficult to work with and could create puckering.
Many ladies however, have used sheets with success so you need to make that choice for yourself.
Vintage sheets seem to work well for quilting so you might want to check them out.
I do go into more detail about sheets in, “What You Need To Know About Quilt Backing”, that you might like to check out.
When choosing the right fabrics for your first quilt or quilt project, its a good idea to purchase the best quality you can afford.
The better the quality the easier it will be for your first time with the quilting process.
This way you won’t get discouraged while you are in the learning process.
One of the fabrics in my very first quilt turned out not to be the best of quality in both feel and durability even though I thought I was picking the right one.
It was more frustrating to work with but since I have sewn most all of my life I managed to make it work.
It would have been a much more pleasant experience though if all the fabrics of my first quilt had been high quality.
So, obtain the best you can afford and you will be much happier with your finished project.
Buying fat quarters is an easy way to acquire the fabrics needed for your quilting projects when you are starting your first quilt.
Other choices when learning to quilt is to purchase fat quarter bundles (such as this one on Amazon).
Also jelly rolls (like this one on Amazon) work wonders.
Or 10″ pre-cut squares (like this one on Amazon) that give you options for cutting smaller.
All these choices are already in a fabric pattern line with all the fabrics in matching coordinating colors and patterns.
These fabric pre-cuts makes it really easy to get started quilting!
What Is Quilt Batting
When you have finished your quilt top and are now ready to layer and baste your quilt you need a quilt batting and backing fabric to make your quilt sandwich.
Batting is the soft middle layer between the quilt top and backing of a quilt that gives it definition, loftiness or thickness and offers warmth.
Purchasing batting is done according to the amount of thickness or springiness you desire in your finished quilt or quilting project.
Batting comes in a variety of thicknesses and fibers with choices nearly as varied as are the choices for fabrics.
Cotton and polyester, or a blend of the two, are the most widely used fibers for batting.
I’ve mostly used cotton batting which gives a flat, traditional appearance when quilted.
I love the look of vintage quilts so this one really appeals to me (link to read reviews on Amazon) and I’ve loved working with it.
Cotton batting is soft and drapable, shrinks 3 to 5% when washed so can give a puckered appearance if washing the quilt after quilting to give your quilts that old fashioned look that so many love including me.
Polyester batting is resilient and lightweight.
It’s readily available in many lofts and suitable for hand and machine quilting.
It’s synthetic fibers lack breath-ability though, unlike cotton with it’s natural fiber that does breath.
High loft polyester batting is good for comforters and tied quilts.
Cotton/polyester blend batting is easy for beginning hand quilters to needle and is readily available.
With some natural fibers this cotton/polyester batting does breath.
You will find some shrinkage which you can avoid in some cases if desired by simply prewashing it.
It’s appearance is moderately flat combining the characteristics of both cotton and polyester, is drapable and low to medium loft.
Choose the type of batting you want for your quilting project based on the finished projects and desired appearance.
The batting qualities will determine the distance between the quilting stitches.
Checking the manufacturer’s label will specify the maximum distance that is recommended between the stitching rows.
Deciding on whether there will be dense or sparse quilting stitching is a good idea before selecting a batting.
Beginning Quilter’s Cutting Tools And Supplies
Whether you are going to be making quilts or other quilted projects by hand or machine there are a few essential tools.
And supplies that will make your quilting tasks easier, more accurate and a lot more fun if you use the right ones.
In the days when my Grandmother made her quilts she used scissors to cut out her fabric pieces.
Scissors can still be used if that’s all you have or can afford but revolutionizing the industry and streamlining the process we now have the rotary cutter, ruler and rotary cutting mat.
Rotary Cutters Used For Quilting
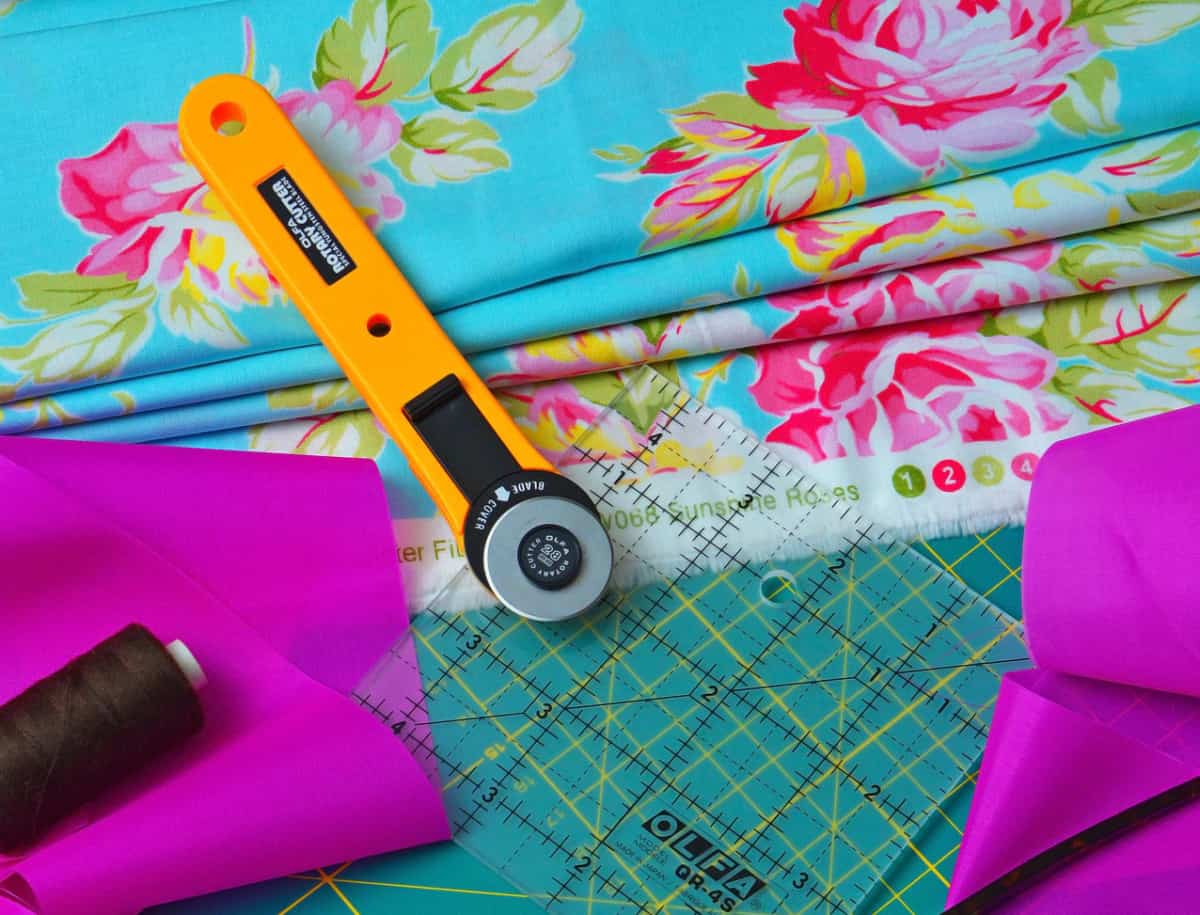
Rotary cutting is a quick cutting method for making the different sized fabric pieces you will need for making your quilts.
Even though you can cut your fabric pieces with scissors, by using a rotary cutter your pieces of fabric will be much more accurate in the sizes you need.
Rotary cutters make quick work of cutting your fabrics.
Rotary cutters come with different sized blades and with a variety of handles.
If possible its nice to try the cutters out before buying so you can see which grip and size works best for you.
For beginners I find that either a size 45 mm or 60 mm blade is good to start with, the 45 mm probably being the preferred one if only one can be obtained.
My first rotary cutter was made by Fiskars and it was fine for my first one.
But then I was able to try other brands.
I quickly learned that I really loved the 45 mm Olfa rotary cutter (link to read reviews on Amazon).
For me Olfa rotary cutters just work really great!
I’ve also come to really love my smaller 28 mm bladed Olfa rotary cutter (link to read reviews on Amazon) for when I’m cutting smaller pieces and trimming up small blocks.
And then there’s the tiny Olfa rotary cutter with an 18 mm blade (link to read reviews on Amazon).
I find the 18 mm blade cutter really nice for quickly cutting threads at my sewing machine.
And other small cutting jobs such as cutting curves and appliqués.
When purchasing a rotary cutter, especially if you are not used to using one, its a really good idea to make sure the rotary cutter blade automatically retracts.
Rotary cutters look like pizza cutters and their blades are extremely sharp.
To be protected its a good choice to get one with a retracting blade or at least has a protective cover for the blade when not in use.
From the very beginning of my quilting journey I’ve learned to always retract my rotary cutter’s blade just as soon as I’ve made each cut.
But if you aren’t sure you will be able to remember to do that or you might get distracted by children or pets, it’s best to get the automatic retracting ones.
A rotary cutter can cut through several layers of fabric at one time.
This allows you to save even more time when cutting out your different fabric pieces for your quilts.
The larger Olfa 60 mm blade rotary cutter (link to read reviews on Amazon) is especially nice for this.
It can cut up to 6 to 8 layers of cotton fabrics at one time easily and accurately with a nice sharp blade.
I generally like to stay with about 6 layers or less for more accuracy.
What Is A Rotary Cutting Mat
In order to cut fabrics with a rotary cutter it is a must to have a rotary cutting mat that is designed specifically for this type of cutting.
The cutting mat protects your work surface from being permanently damaged from cuts and scars from the very sharp cutting blade.
Rotary cutting mats come in many styles, shapes and sizes.
Purchasing a large self-healing rotary mat that is at least 18″ along one side is a good one to start with.
Omnigrid makes an 18 X 24″ mat (link to read reviews on Amazon) that is marked with a 1″ grid, has hash marks at 1/8″ increments and 45° and 60° angles that is probably the best first choice (or similar mat).
Mats that are labeled as “self-healing” means that the blade does not leave slash marks or grooves in the surface of the mat even after repeated usage.
As long as you don’t bear down really hard that is when rotary cutting.
Cutting mats usually have one side that has printed grid lines on it and the other side is plain.
Both sides can be used to cut your fabric on and some even like to cut on the plain side to avoid getting confused when lining up fabric with pre-printed lines on a ruler.
To help keep your mats in good condition they need to be stored flat or hanging on a wall to avoid being warped.
Rotary cutting mats can be damaged from heat so keeping them out of direct sunlight is a must and never leave them in a hot car, they will warp badly, some brands more than others.
Are Quilting Rulers Essential
Quilting rulers are essential for cutting your quilting fabric pieces which helps to get precise measurements which is important for accurate piecing.
These rulers, made of clear acrylic are thick making it easy to cut straight cuts with your rotary cutter and they also serve as a measuring tool.
Measurements are visible through the clear ruler so you can cut your fabric pieces without marking.
Rulers come in a wide variety of sizes and shapes.
There’s a ruler for just about every type of project or cutting need you will have.
Some rulers are printed with measurements that are in two colors to show clearly on both light and dark fabrics.
Some are non-slip and some are printed on the underneath side to prevent distortion and increase accuracy when cutting.
I’ve tried different brands of rulers and by far my favorite ones are made by Omnigrid.
With so many sizes and types of quilting rulers its hard to know which ones are needed when starting to quilt.
Because it’s so versatile, rulers, such as a 6 x 24″ ruler (link to read reviews on Amazon) that is marked in 1/4″ increments with 30°, 45°, and 60° angles, are a good beginners ruler.
A good second choice for a ruler would be a 6 x 12″ size (link to read reviews on Amazon) because it’s easier to handle than the 24″ ruler and it can be used for smaller cuts.
The 6 x 12″ ruler can also be used to make crosscut strips.
If you need to cut 12″ blocks or make straightening cuts it can be used with the 6 x 24″ ruler.
Of course you can always purchase a 12 1/2″ square ruler (link to read reviews on Amazon) that works great for this size of quilt block.
As you gain more quilting experience you will find that having more ruler sizes is nice to have on hand.
I find that the ones I use the most (besides my 6 x 24″ ruler) is my 6 x 12″ ruler and probably my 6 1/2 x 6 1/2″ square ruler (link to read reviews on Amazon).
When I’ve needed to cut wider pieces, which can be pretty often, I really like to use my Omnigrid 8 x 14″ ruler. It does get lots of use.
Through the years I’ve added other sizes and square rulers plus a few specialty rulers as well to help in my quilting process.
Choose the rulers that have the features most important for the type of quilting you plan to do.
Scissors And Snips Used For Quilting
Like all sewing projects, quilting does require a good pair of scissors and or snips.
You probably already have a good pair or two if you are a sewer.
But if not you want to choose scissors and or snips that are of the highest quality you can afford.
There’s nothing like having a drawer full of dull scissors that you won’t use or just don’t do the job of cutting like they should.
I, like most quilters, have several pairs, each designed for a different purpose.
For quilting, as you do when sewing, you will need to cut threads, trim fabric edges or snip corners with scissors dedicated for sewing and quilting, but never used for cutting paper.
I see many quilters that like to use large shears (which I have, Tailoring Shears by Kai and absolutely love (link to read reviews on Amazon)).
But honestly, for me, the sizes I use the most for quilt cutting and trimming jobs are a couple of smaller scissors and snips.
My wonderfully sharp, smooth cutting Fons & Porter 6 1/2″ scissors (link to read reviews on Amazon) are an absolute joy to cut with.
I keep them close to my cutting table.
I don’t know what I would do without them, they really are that good!
I also use my Gingher 5″ very sharp scissors (link to read reviews on Amazon).
And a pair of Havel’s Snip-Eze 4-3/4-Inch Embroidery Snips (link to read reviews on Amazon) that I always keep at my machine.
I can’t really do without these either!
General Sewing Notions For Quilting
There are a few more sewing notions that are handy to have that will make quilting a more pleasant and enjoyable experience.
If you have been sewing for any length of time you probably already have many of these items.
For the items you don’t have you can easily build your quilting supplies as you need them, watching for sales to help create your stash.
That’s exactly what I did when I started my quilting journey, adding items I didn’t already have as I gained more experience.
What Pins Or Clips Are Helpful When Quilting
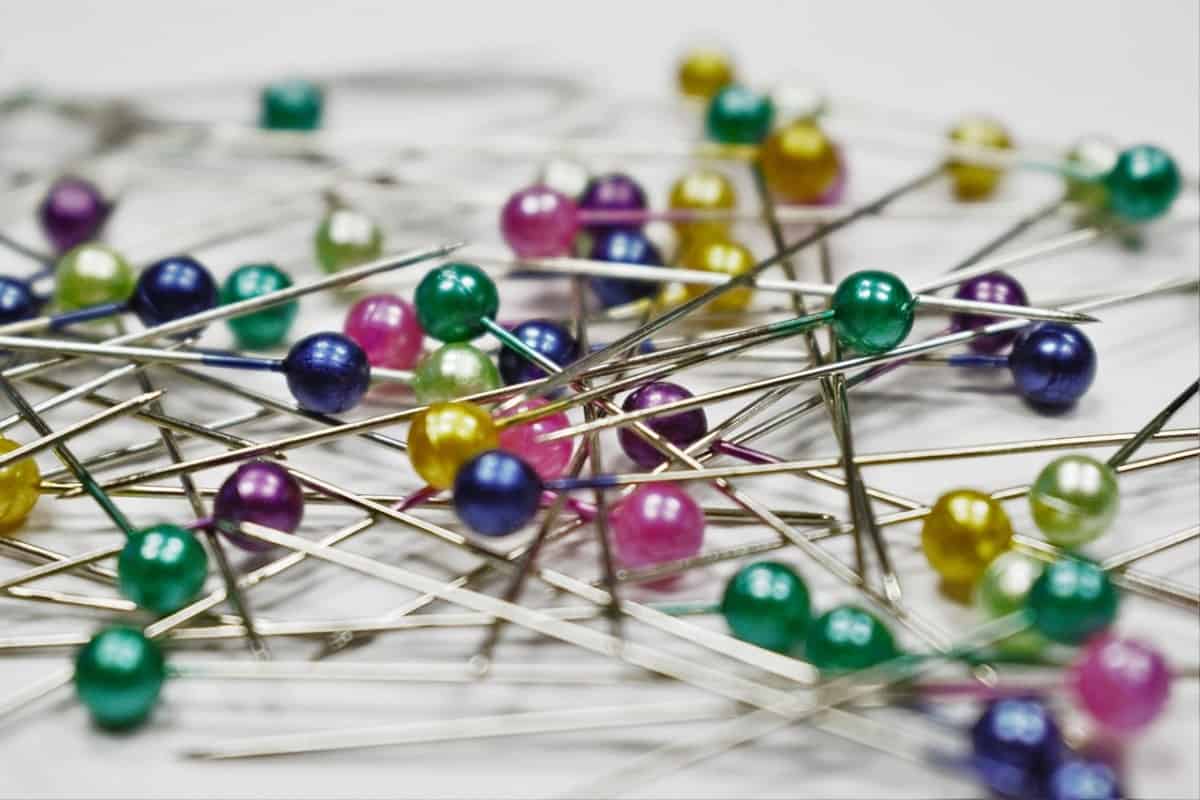
Pins are needed for various steps of the quilting process.
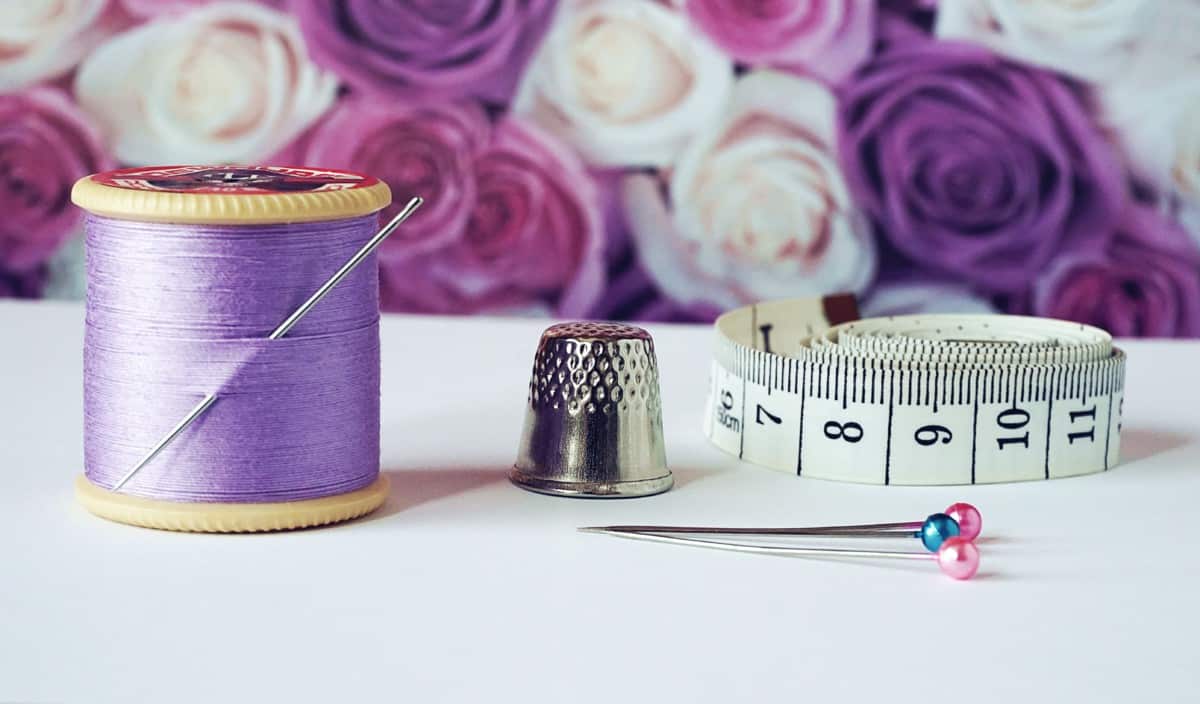
Its nice to have some extra-fine glass head pins (link to read reviews on Amazon) like the the ones I use so you can easily press over them so they don’t melt onto your fabric.
Ultra fine glass head silk pins (link to read reviews on Amazon) are another good addition for quilting.
When you are ready to put your quilt layers together for the quilting process, an easy way to baste these layers together is with pins specially made for this purpose.
I have a lot of curved basting safety pins (link to read reviews on Amazon).
They are nice and sharp, slide easily through the layers, making it easy to baste the quilt layers together without moving the quilt sandwich.
The Kwik Klip (link to read reviews on Amazon) is a device that can be used to help you to close the pins easily.
The Kwik Klip helps to prevent hand fatigue and also helps to prevent fingernail breakage.
The Kwik Klip speeds up your basting time and so worth having.
You can also use a grapefruit spoon which will work pretty good although I’ve never used one.
There’s one more type of pins that I absolutely love for pinning my bindings to the back so I can hand sew them into place.
These Clover Appliqué pins (link to read reviews on Amazon) are nice little sharp short pins which nearly disappear into the binding.
Using these, my thread doesn’t keep getting tangled up around the pins as I hand sew the binding down!
The Clover Appliqué pins are wonderful too for pinning down appliqués for which they were designed to do.
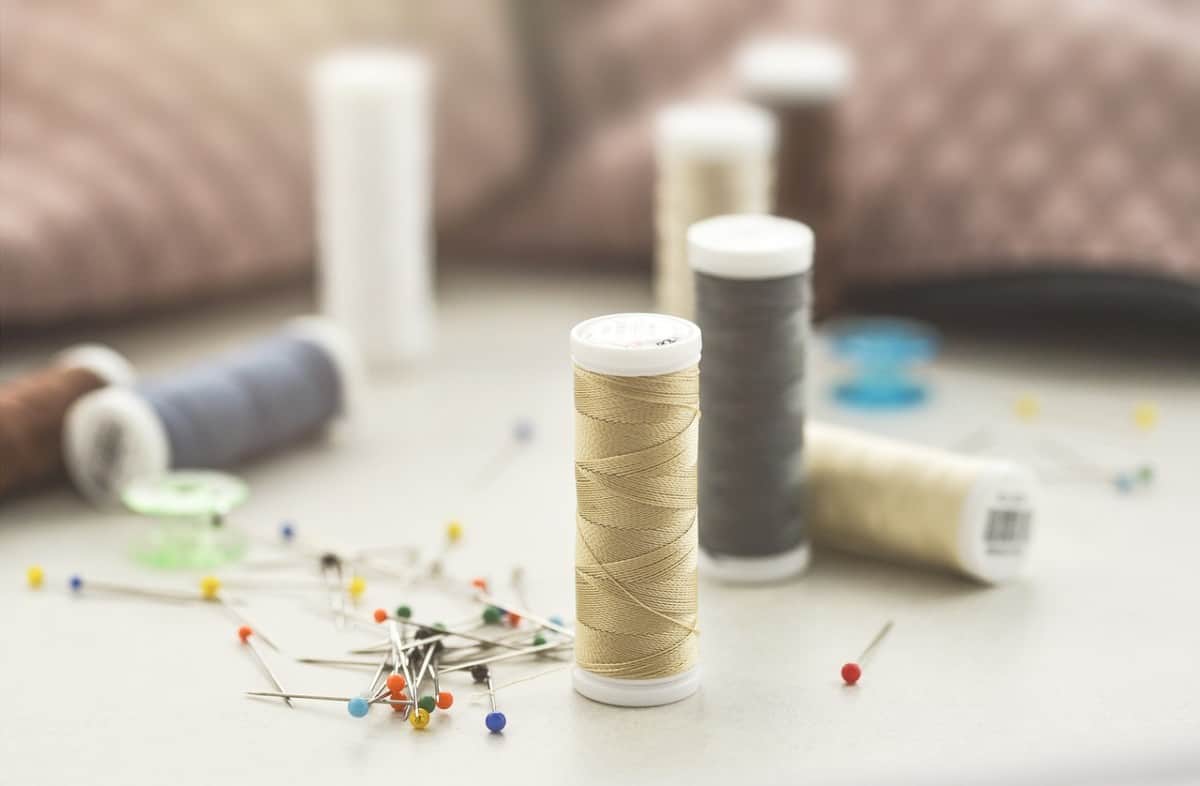
Thread Plays A Role When Quilting
To hold everything together when quilting it is essential to have some thread.
There are multiple roles that thread makes.
From holding the patchwork pieces together, to keeping appliques attached
And securing the quilt sandwich together among other things.
To have a successfully quilted project, choosing the right type and color is essential.
For most piecing and quilting projects it’s better to match the thread to the fiber content of your fabric.
Most quilters use cotton thread since the fabric is usually 100% cotton.
Beings that cotton thread is equal in strength to cotton fabric you will find that quilts will wear more evenly.
It is really best if you can afford it to stay away from the brands of thread that are on the low end of quality and cost.
You will find that the higher more expensive threads will not cause as much lint as the lower end threads tend to do.
This way you won’t have to clean out your sewing machine nearly as often.
That’s one job I’m not crazy about but does need to be done!
Threads that I like to piece my quilt tops together with are Gutermann (link to read reviews on Amazon), Aurifil (link to read reviews on Amazon) and Superior (link to read reviews on Amazon).
I really like to use the Superior thread for when I’m machine quilting as it sews really nice and comes in a variety of thread colors to choose from.
These three recommended threads (Gutermann, Aurifil and Superior) also work well for hand stitching your bindings to the back of the quilt.
I find I’m usually using light cream colors mostly when piecing but sometimes it works better to use white.
Then when these colors don’t seem to work very well with certain fabric colors I will use a light grey since that color blends in well with most fabric colors.
If I was making a quilt that was mostly all dark fabrics I would certainly stay with dark threads that would match the fabrics the best.
Is A Seam Ripper Necessary
Is a seam ripper necessary to have? Yes, it happens to the best of sewers and quilters.
We sometimes find it necessary to remove a few stitches while we are sewing.
Its not my favorite part of sewing but it is a necessary thing to do to correct what stitching we have done that wasn’t quite right.
So what better than to have a really good seam ripper.
I, like probably many quilters, have several seam rippers around my sewing studio.
But by far the seam ripper I like the most is a sharp, good quality one that I pretty much use most all the time the need arises to reverse sew.
This seam ripper (link to read reviews on Amazon) does make the task of removing stitches so easy, I highly recommend it.
I’ve had this one for many years and its just as sharp as the day I purchased it.
What Sewing Needles Should Be Used
Using the correct needle size and type whether you are hand sewing or machine sewing will be easier for you and give better results.
Machine needles usually come with two numbers separated by a slash mark.
The first number is the European size and the second one is the American size.
A lower number for a machine needle indicates a finer needle.
For quilting, the most common needles used are sizes 70/10, 80/12 and 90/14.
The needle point should match the type of fabric you are sewing on and for cotton that should be needles that are labeled as sharps.
I usually always use the 70/10 size in a microtex sharp point (link to read reviews on Amazon).
I find these to work really well for when I’m quilting.
For hand sewing on your quilting projects, choosing the hand sewing needles is determined by your fabric also.
Hand needles are determined by its diameter which come in two ranges in diameter size: 1 to 15 and 13 to 28.
The larger the number of the needle, the finer the needle will be.
For any general sewing or attaching my bindings to the back of my quilts I like to use these milliners needles (link to read reviews on Amazon).
I also love these sharp needles made in England (link to read reviews on Amazon).
Sharp points on hand sewing and quilting needles pierce the fabric easily making sewing more enjoyable.
There’s nothing worse than using a dull needle!
Making sure to have a nice sharp needle whether for your machine or for sewing by hand will make life so much better and fun!
Are Needle Threaders Helpful
Needle threaders can make life simpler when it comes to threading a needle.
I love that my sewing machine has it’s own needle threader making it so much easier to get the thread into the needle.
Needle threaders come in various models.
You might like to try different ones to see which ones work best for your vision and coordination skills.
They do help to prevent eye strain.
I have a few different needle threaders but the one I like and use the most is this one (link to read reviews on Amazon).
I actually have two of them!
I found another really nice one (link to read reviews on Amazon) I wish I had.
It’s going on my wish list for sure!
Pin Cushions – Why They Are Wonderful
I love pin cushions and who doesn’t.
They are wonderful to have to keep your pins close and easily accessible when you are sewing or quilting.
They come in so many shapes, sizes and designs from the traditional tomato shape (link to read reviews on Amazon) to pin cushions that go on your wrist to magnetic ones to have on your machines.
Some of our computerized machines might have problems if using magnetic pin cushions.
So it’s a good idea to check your owners manual before attaching a magnetic cushion to your machine.
I like to keep a wrist pin cushion (link to read reviews on Amazon) on when I’m pinning and sewing my binding to the back.
It makes is so much easier to have the pins really close and handy.
For a magnetic pin cushion to grab your pins that sits on your sewing or cutting table this one is a really nice one (link to read reviews on Amazon).
Using the strawberry shaped needle cushion filled with emery sand that’s usually attached to the tomato shaped pin cushions are wonderful to run your needles through.
This helps to keep them sharp and free from nicks, burrs and residue.
You can easily make your own with this emery sand (link to read reviews on Amazon).
Or purchase one already made for you (link to read reviews on Amazon).
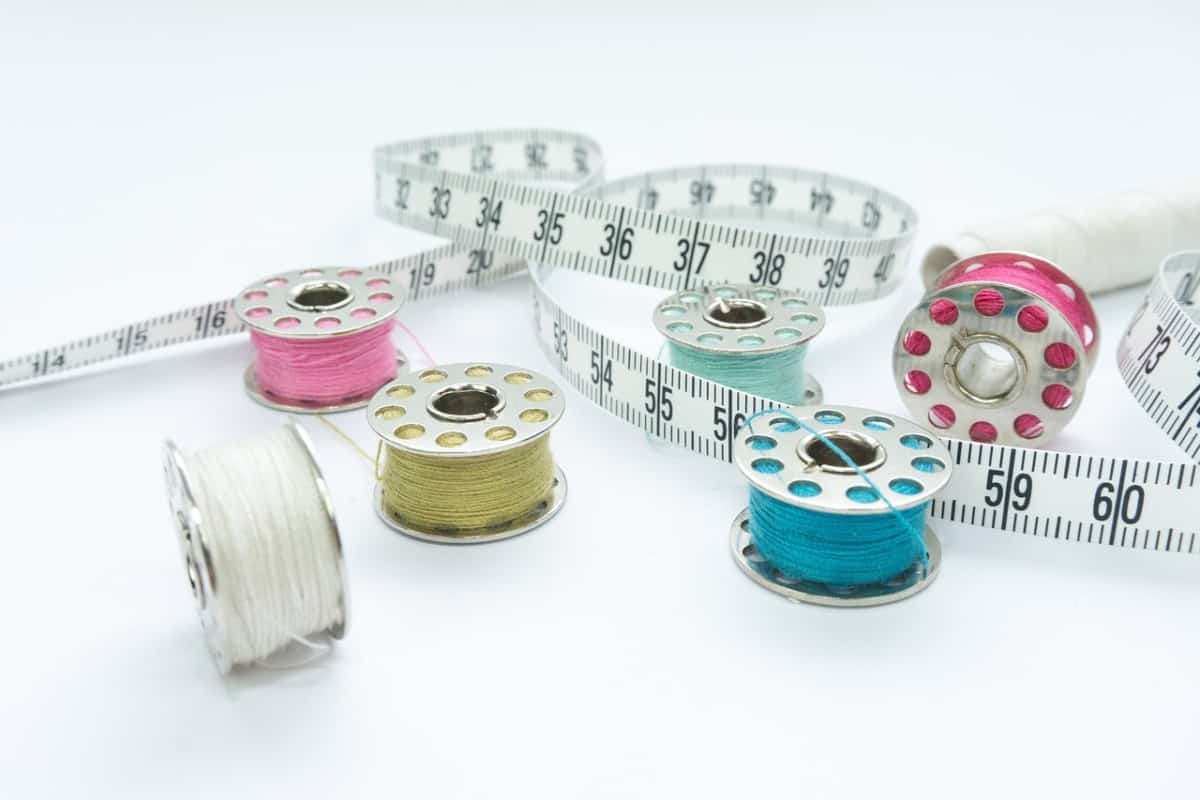
Why Measuring Tapes Are Needed
Having a measuring tape is essential for measuring large lengths such as borders and squaring up quilts for instance.
You need one that is nice and long and these 120″ measuring tapes (link to read reviews on Amazon) are perfect for the job.
Make sure they are 120″ long which is twice the length of most measuring tapes so you don’t have to move the tape midway when measuring your quilt.
If you use a cloth measuring tape instead of the ones like I’ve recommended, remember that after time, a well used cloth one might stretch some and become inaccurate.
Adhesives – Different Kinds And Uses
Adhesives come in different forms such as basting sprays and fabric glues.
For a quilter, these can be wonderful helpers for when we are quilting.
Spray adhesives and fabric glues give the ability of repositioning fabric pieces such as appliqués and quilt layers when working with your quilt project.
Basting sprays temporarily hold appliqués in place for hand or machine sewing but can easily be re-positioned if needed.
Likewise, when basting your quilt sandwich together (if not using basting pins) its nice to be able to reposition the layers while sandwiching them together to make sure there are no creases in the layers.
Fabric glue comes in many different forms, in bottles with needle-tip applicators or even as a glue stick.
You need to make sure that the kind of glue you are using is safe for fabric, is water-soluble and acid-free.
When the fabric glue drys it is more pliable than your standard glues.
And some temporarily bond the fabric allowing you to reposition pieces but don’t leave permanent residues on your quilt.
The quilt basting sprays I use are June Tailors quilt basting spray (link to read reviews on Amazon) and Odif Usa 505 Spray and Fix Temporary Fabric Adhesive (link to read reviews on Amazon).
These have always worked great for me.
The fabric glue that I use is Roxanne Glue Baste It (link to read reviews on Amazon).
It comes with a unique syringe applicator that allows controlled placement of droplets of glue making it so easy to use.
Sewline makes a glue pen (link to read reviews on Amazon) that makes it easy to glue baste down edges and corners on appliqués.
And for times when pinning isn’t as convenient.
Graph Paper Useful When Designing A Quilt
Squared graphing paper is nice to have if you plan to draw out a quilt design.
It can be fun to make up your own quilt patterns to see if you like the design before cutting up your fabric.
It’s so easy to use colored pencils to color in the different quilt blocks for your choice of color wave.
Graph paper is easy to find in most stores that carry office supplies or you can find the kind I use here (link to read reviews on Amazon).
Quilting Gloves For Free-Motion Quilting
When free-motion quilting, having a pair of quilting gloves will really help.
Quilting gloves allow you to move the fabric more smoothly and with a lighter touch so that you aren’t straining your hands and wrists as much as you would without them.
Machingers quilting gloves (link to read reviews on Amazon) have soft, flexible fingertip grips for giving you full control when free-motion sewing.
They help relieve the tension and stress that can be caused by free-motion quilting with their enhanced wrist support.
Some people have found Machingers quilting gloves helpful when piecing their quilts, adding borders and sewing sections of the quilt together.
These Machingers quilting gloves give better control of the bulk of a quilt from pulling as they are sewing.
Grabaroo quilting gloves (link to read reviews on Amazon) are also another great glove for machine quilting.
Each finger of the gloves have little gripping dots which help to control and move the fabric while quilting without slipping as quilts can become heavy and bulky to move.
They can even help to protect hands and fingers from pin pricks while giving dexterity to pick up pins.
These Grabaroo quilting gloves are also great to help protect your hands while steam ironing so your fingers don’t get quite so hot from the heat.
Sometimes you can find similar gloves in the gardening section of stores.
Quilter’s Marking Tools And Supplies
There are times when quilting that marking sewing lines and quilting designs on your quilt tops is needed.
There are many useful tools and supplies available such as fabric markers, stencils and templates.
The project you are working on will determine the kind of fabric marker, stencil or template that you will need.
I have several of the different ones and find that each is needed depending on what I am working on.
Trying and testing different ones will help to determine which ones you like using the best.
Useful Fabric Markers For Quilting Projects
Fabric markers are useful for marking lines on the fabric for showing where to sew and come in a variety.
The silver artist’s pencil often works on both light and dark fabrics.
A chalk pencil is easy to use but some tend to brush away easily so it is best to mark as you go if using one of them.
This Bohin Extra-Fine Chalk Pencil (link to read reviews on Amazon) doesn’t rub off so it would be great for any marking you need to do.
Mechanical pencils found at most office supply stores are great with their sharp lead that makes a fine line.
But you need to mark lightly so that the stitching or quilting will cover the marks.
Sewline has a Fabric Pencil (link to read reviews on Amazon) with ceramic lead that works great on fabric and can be easily removed.
I definitely love mine!
Quilter’s Rule Int’l makes a Marking Pencil Removal spray that most quilting shops will carry for safely removing pencil marks when needed.
There’s also a fabric eraser (link to read reviews on Amazon) that I use that does the job too without leaving eraser marks.
If you want to mark quilts without leaving any pencil or chalk marks you can use a Hera Marker (link to read reviews on Amazon).
A Hera Marker leaves a crease mark that’s removed very easily.
Works on any color and weight of fabric.
You will love this marker, they are great to use.
Some Quilting Methods Require Quilting Stencils And Templates
Some of the methods when making quilts require stencils or templates when marking the quilting lines and quilting design patterns.
You can find a large variety of stencils or templates made from materials that include template plastic, tear-away paper and heavier-weight acrylic plastic.
Stencils and templates are helpful for marking intricate design lines.
A variety of shapes, sizes and designs of pre-cut stencils and templates can be found in quilt shops.
Creating your own stencils using the no-marking method is made easy with the use of this high quality quilting paper (link to read reviews on Amazon).
It tears away cleanly without pulling your stitches and helps stabilize the fabric.
I’ve used this quilting paper many times when quilting my quilts with excellent results.
You can create your own iron-on templates with freezer paper.
Graph paper can also be used by drawing the desired pattern on it and gluing the graph paper to template plastic.
In searching I found a water-soluble transfer paper (link to read reviews on Amazon) for do-it-yourself transfer designs that can be run through a copier, printed on by inkjet printers or drawn on by hand.
Necessary Pressing Equipment For Quilting
When it comes to quilting or any sewing for that matter, you simply can’t do a really nice job and get professional results unless you do some necessary pressing at each step of the process.
It is so essential for successful quilting to have the proper equipment.
And it will make the difference in the quality of your finished quilt.
What Irons Are Needed When Quiltmaking
For quiltmaking, a good iron is essential.
An iron that has a cotton setting and can either be adjusted to use steam or not is used for ironing the uncut fabric before cutting it.
It’s also used for pressing the seam allowances and quilt blocks as you sew.
Small portable travel or craft irons such as this one (link to read reviews on Amazon) are great for pressing seams on small pieces next to your sewing machine.
They are also wonderful to take with you for when you are going to a quilting class.
Because of their size they’re easier to use when pressing down appliqués and bias strips.
There are a variety of larger irons that make pressing your quilting tops and larger pieces of fabric or blocks more of a joy than a chore.
An iron such as this one with a soleplate made of titanium-infused ceramic (link to read reviews on Amazon) that resists buildup from fabric sizing or spray starch makes pressing easier.
With an automatic shutoff feature when not in use for 30 minutes makes it great for quilting.
Most irons shut off too soon when used for pressing while sewing.
Another nice iron is this professional grade steam iron (link to read reviews on Amazon) with rapid even heat and a scratch resistant stainless steel non-stick soleplate.
It’s German engineering is designed to outlast the competition, made with 40% stronger materials and quality parts to stand the test of time.
Ironing Board Choices When Quilting
Just about everyone has an ironing board of some kind.
When quilting its good to have one that is close to where you are sewing if possible.
We as quilters have many choices when it comes to pressing while quilting.
From the traditional ironing boards to portable pressing mats.
And even cutting boards with pressing surfaces on the opposite side.
With so many options to choose from, to press on a wool ironing mat (link to read reviews on Amazon) is great for quilters since it holds the heat.
So it’s like ironing from both sides at the same time making the seams flatter.
Great for taking to classes, traveling or for when you need to put things away after quilting is this fold-away cutting and pressing station (link to read reviews on Amazon).
It’s compact, efficient and perfect for small spaces next to your sewing machine for cutting, trimming and pressing.
Why Starch And Sizing Might Be Needed
Some quilters like to pre-wash all their fabrics before cutting.
This removes all the sizing of the fabric making it more limp.
Starch and sizing can make the fabric pieces a little easier to handle and hold their shape while pinning and sewing.
To add stiffening to pre-washed fabrics or appliqué projects you will need to use the spray starch.
If more body is what you need instead of stiffness, using spray sizing (link to read reviews on Amazon) is what you would use, it’s the one I use.
Flannels are made a little easier to work with by using sizing.
Many quilters use Mary Ellen’s Best Press (link to read reviews on Amazon) which is a clear starch and sizing alternative.
It helps release wrinkles with soil guard making ironing easier.
What Equipment Is Needed For Quilting
When it comes to quilting, you can certainly sew the patchwork pieces by hand and many do but there’s an essential piece of equipment that is a must for most of us quilters.
It’s the sewing machine, a straight-stitch conventional sewing machine.
What Sewing Machines Are Best For Quilting
There are many brands of sewing machines and just about any of them will do when it comes to making a quilt.
It must be able to sew a nice even straight stitch.
You need to become very familiar with your machine if you haven’t already because you will be sewing a lot.
Remember, quilting can become a fun addiction!
If you don’t already have a sewing machine, finding one that works best for quilting would be one that has a larger throat area so there is plenty of room for the quilt to run through the machine, especially if you plan to free-motion quilt.
I always tell people when I’m asked which sewing machine is best for quilting that its beneficial to find the different sewing machine dealers in your area and go take a look at the machines they have.
Sit down at the machines and do some practice sewing on them with the kinds of fabrics you would be sewing on most of the time.
Ask lots of questions.
I have found that the best sewing machine dealers are the ones that are easy to work with, give classes for your machine to learn how it works and have a good reputation when it comes to servicing your machine.
You will be much happier if its easy for you to deal with who you purchased your machine from.
It’s very important to keep your sewing machine in good clean working condition.
Cleaning out the area under the throat plate regularly is very important as fabric, thread and batting will create lint under the plate, clogging up your machine causing it not to sew as well as it should.
Its a really good idea to take your machine to have it professionally serviced fairly often, the more you sew the more often that will be.
It will make your sewing and quilting life a more pleasant experience if you do.
What Sewing Machine Accessories Are Helpful While Quilting
Even though a simple straight stitch conventional sewing machine is all that you need to make an entire quilt, there are a few sewing machine accessories that will help make your quiltmaking life easier.
Many sewing machines will come with a few standard accessories.
Other machines have optional accessories that are available.
Using a straight stitch throat plate (also called a needle plate) will allow for more uniform seams and quilting lines.
Because it has a small hole for the needle to go through, it keeps the fabric from being pushed down into the machine while it is being stitched.
A straight stitch throat plate is also used with an even feed foot (walking foot) and darning foot when machine guided or free motion quilting.
Creative tip…to keep the sewing machine foot pedal from creeping on carpeted floors, adhere the hook side of self-sticking Velcro on the bottom of the foot pedal.
I love my 1/4″ presser foot for sewing my quilt pieces together.
You can also use a straight stitch foot to sew the narrow seam allowances but I find it is so much easier if I use my 1/4″ foot.
Sewing a lot when making quilts its nice to have a few extra bobbins that are already wound before you start sewing.
This is especially nice if you are going to be free motion quilting your quilt.
An almost necessary accessory to have when quilting your quilt is to have a walking foot (even feed foot).
The feed dogs on the foot work with the feed dogs of the sewing machine, pulling the fabrics through the machine at the same rate of speed.
This way you don’t get the bunching that can happen if you don’t use a walking foot.
Some machines don’t bunch as much as others.
If your sewing machine is not in a cabinet like mine aren’t you will love using a quilting table for your machine.
A Sewsteady 24″ x 32″ Portable Table (link to read reviews on Amazon) fits neatly against your machine, basically turning your machine into a quilting specialist, giving a larger working surface to sew on.
It really does make sewing with large pieces of fabric a joy with the expanded workspace it gives.
I really don’t know what I would do without mine!
The Sewsteady Wish Table (link to read reviews on Amazon) comes with a blue compartmentalized notions tray for storing things underneath, doubling usable space.
This Sewsteady Wish Table also has a neat universal table grid and a circles sewing tool that comes with it.
All Sewsteady tables are made to order to fit your specific sewing machine and come in different sizes.
These tables truly do make quilting a breeze because it helps keep your quilt from pulling so much when sewing it.
I have one for each of my two machines and I don’t know what I would do without them!
They make sewing everything so much easier.
Even one of my sergers has it’s own Sewsteady Table! (link to read reviews on Amazon)